An avid hiker may aspire to hike the entirety of the Appalachian Trail. A creative writer may dream of finishing their first novel. A talented swimmer may work towards swimming the length of the English Channel. But me? When it comes to setting milestones for my adventures in building frames for my paintings, the very first I set was to one day build a Dutch Ripple frame. Why? Because I am a NERD. And my particular nerdy obsession is for all things Dutch Golden Age. Moody still lifes. Neck ruffs. But most relevant to this blog post: Dutch Ripple frames.
A brief history
Unfortunately, it is quite difficult to find information on Dutch Ripple frames—I assume because the study of frames often takes a backseat to the study of the painting within the frame. However, I believe that frame production is an art form in and of itself, and the resulting frame a work of art in its own right. The first thing I have been able to glean from my study of Dutch Ripple frames is that the name is misleading. Despite being generally accepted as Dutch, these types of frames were more commonly found in Germany, Flanders, Italy, and Spain. The earliest forms of Dutch Ripples were created as early as the 15th Century. They rose to fashion in the 17th Century, but lost prominence in the 18th Century. However, they became fashionable again in the 19th and 20th Centuries, but just as Victorians were inspired by Gothic architecture (creating the Neo-Gothic aesthetic), there was a resurgence of the Dutch Ripple frame style. The frames produced in this style were slightly modernized and sometimes gilded.

Ebonized
Dutch Ripple frames are often either made of ebony wood (a hardwood known for its naturally dark color) or a lighter wood that has been ‘ebonized’ (stained dark to resemble ebony). When a frame has as much intricate detail as a Dutch Ripple, keeping it all a uniform, dark color keeps the viewer from becoming distracted by the frame and allows the painting within to take center stage.
As for the manner of building these frames, things become even foggier. Based on the uniformity of the ripples in extant frames, ripple moldings were clearly carved using a machine specific to the creation of these moldings; however, the specific design of this machine has been lost to time. It is likely that specific ‘bits’ or knives were inserted into this machine and then dragged along the piece of wood in order to carve precise profiles into the wood, similar to how molding is created using a router or routing table. However, when carving a profile into wood with a router, the wood remains stationary. With ripple molding, the wood must move in specific patterns to allow the knife to create the ‘rippled’ profiles. For more information on this machine, and a better idea of how it might have worked, check out this video about a man named Kurt Nordwall, who works as a frame technician at the Minneapolis Institute of Arts.
Conceptualization of my own Frame
Of course my introduction to Dutch Ripple frames was in the Metropolitan Museum of Art when I went to view some of my favorite Dutch paintings.
Flemish corners
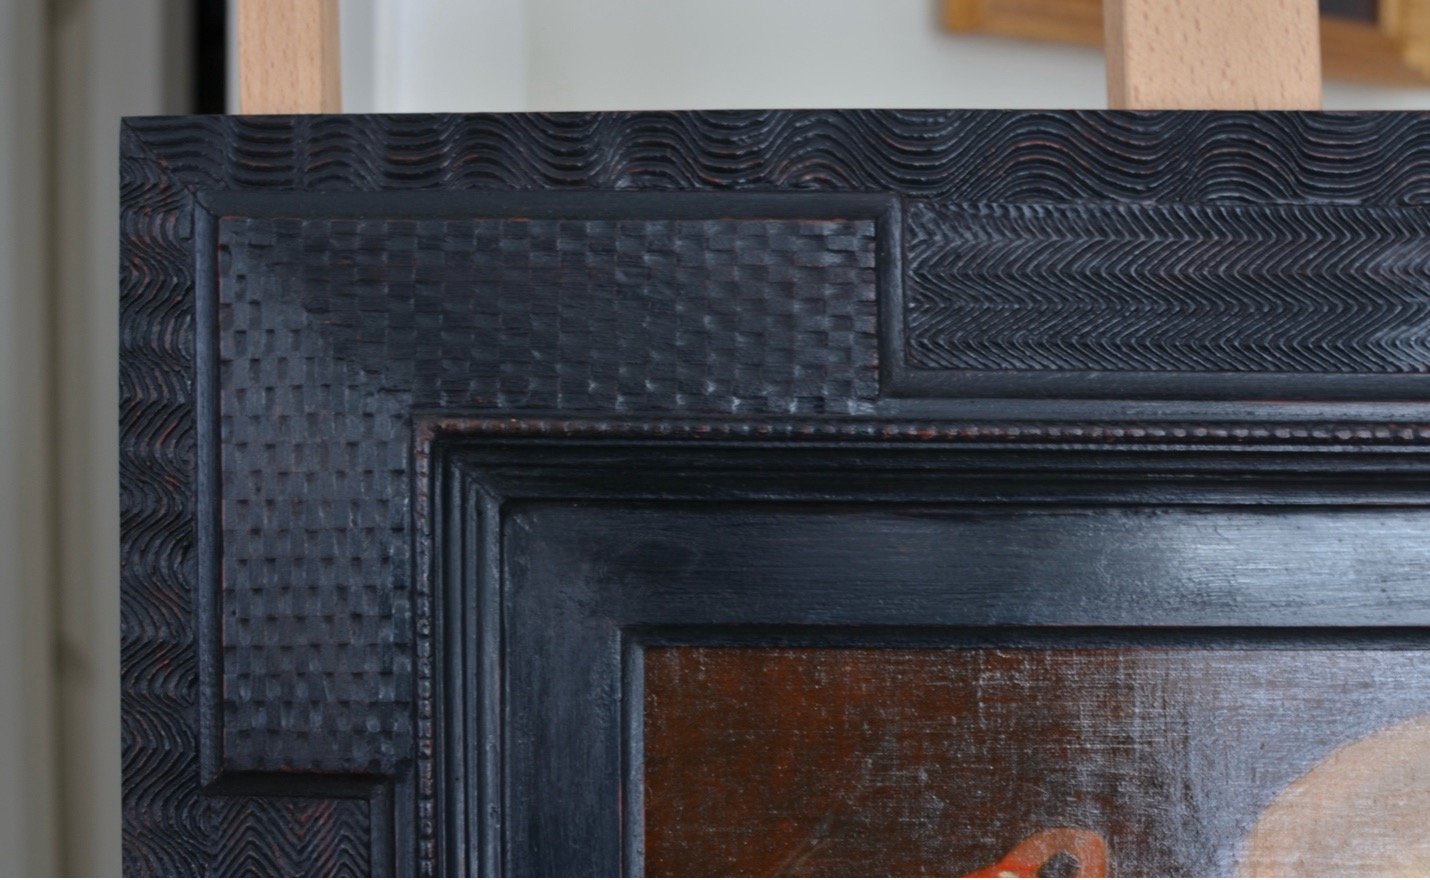
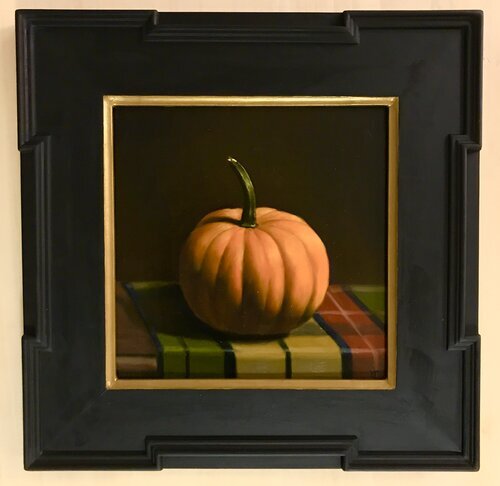
My favorite of the Dutch Ripple frames were the ones with Flemish Corners: the raised ‘platforms’ or extra detail around the corners of the frames (to me, they make the corners look like arrows).
But the one thing that all these rippled frames have in common is that they look disastrously tricky to construct. So, I started with something very simple: the Flemish Cornered frame I built for my painting Pumpkin on Plaid, which I built about three years ago.
Decieving simplicity
Despite the simplicity of this frame, the flemish corners were still tricky to construct. I hand-cut all 20 pieces of the molding because of how precise each cut needed to be.
I was quite happy with how this frame came out, and since I built it, my woodworking skills have greatly improved. So, like any sane human being, I decided the next step from building this simple Dutch-inspired frame was to build a highly intricate, multi-layered, ripple molding adorned, Flemish Cornered frame using materials and techniques that were completely new to me. Because apparently… I have no chill. But also because I had just finished a mastercopy of a Dutch still life (Still Life with a Skull and a Writing Quill by Pieter Claesz) that was a dream to paint, and I knew that it deserved a period-appropriate Dutch Ripple frame.
As for the creation of the ripple molding, I had to get creative. I obviously don’t have access to a ripple molding machine, and the only seller of ripple molding that I knew of was on hiatus at the time (he’s back now, though, go check him out!). I knew I couldn’t carve the designs into the wood, so I came up with a plan to create the designs with a different material: Plaster of Paris. But more on this later.
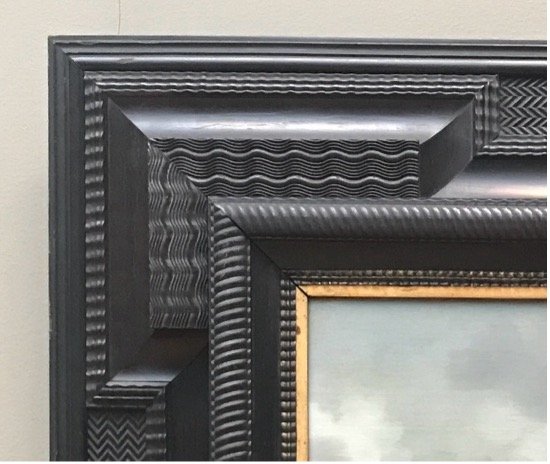
Now that I had a plan for the ripple molding, I began to conceptualize a design. This is one of my favorite Dutch Ripple frames and a major inspiration for my frame:

by Johannes Vermeer
I knew I wanted my frame to be in the same vein as this: lots of texture, detail, Flemish Corners, the works. However, I wanted to avoid the gilding on the inner rim because my painting is quite simple and small, and I didn’t want the intricate and highly detailed frame to overpower the painting. I also wanted some flat space between the inner edge of the frame and the beginning of the ripple. So this was the general design I came up with:

Routed Cove
Flat Space
Dotted Detail Molding
Cove Detail Molding
‘Herringbone’ Ripple
‘Lattice’ Ripple (which I later changed to ‘basket weave’ ripple)
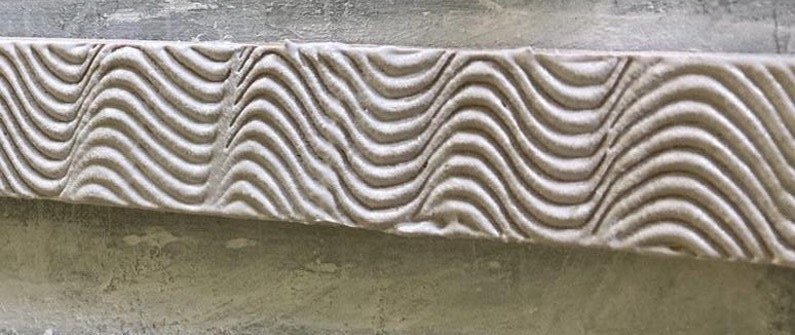
‘Wavy’ Ripple
I put the words herringbone, lattice, basket weave, and wavy in quotes because these are what I named these types of ripples—they’re not their actual, technical terms. The only technical term I have been able to find is ‘Flammleisten’, which is German for ‘flame strips’. Flammleisten refers to the type of ripple that I call wavy ripple.
After I decided on this design, I sat in bed on my iPad and stared at the image for… several hours. I had realized that it was easy to design this all with a flat view, but trying to figure out how to construct the three-dimensional version made my brain hurt. So, I drew up a view of the cross-section (specifically of the Flemish corners) to make sure that the theory would transfer smoothly into reality:

Cross-section
I had already bought my wood at this point, so the letters just represent the different sizes of pre-milled wood I had.
Base Construction
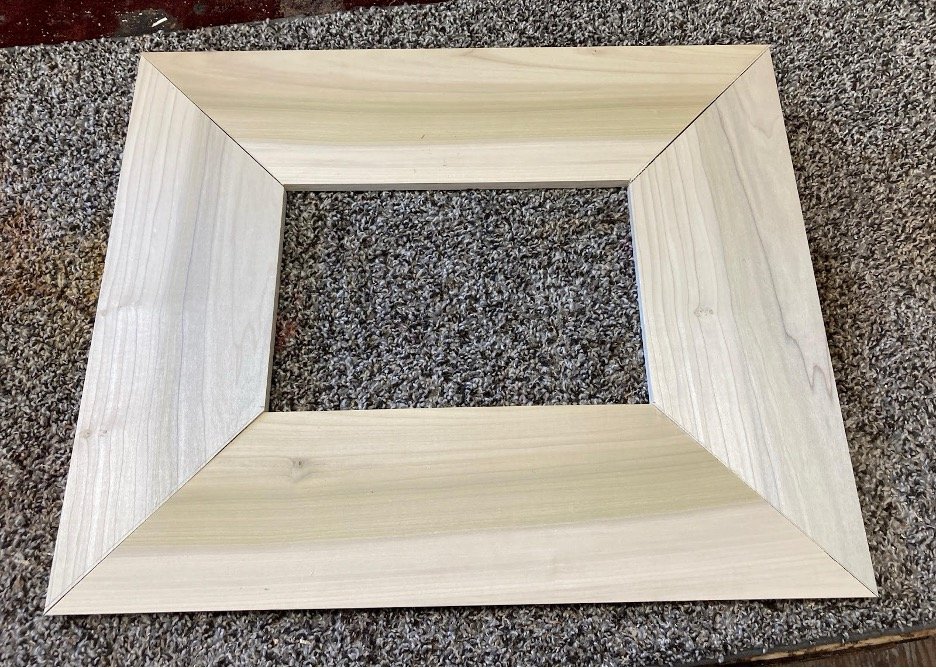
Once I came up with this game plan, it was time for construction! I started with the base (A), then B, D, C, and finally I went back and cut B to follow the shape of the Flemish Corners (C):
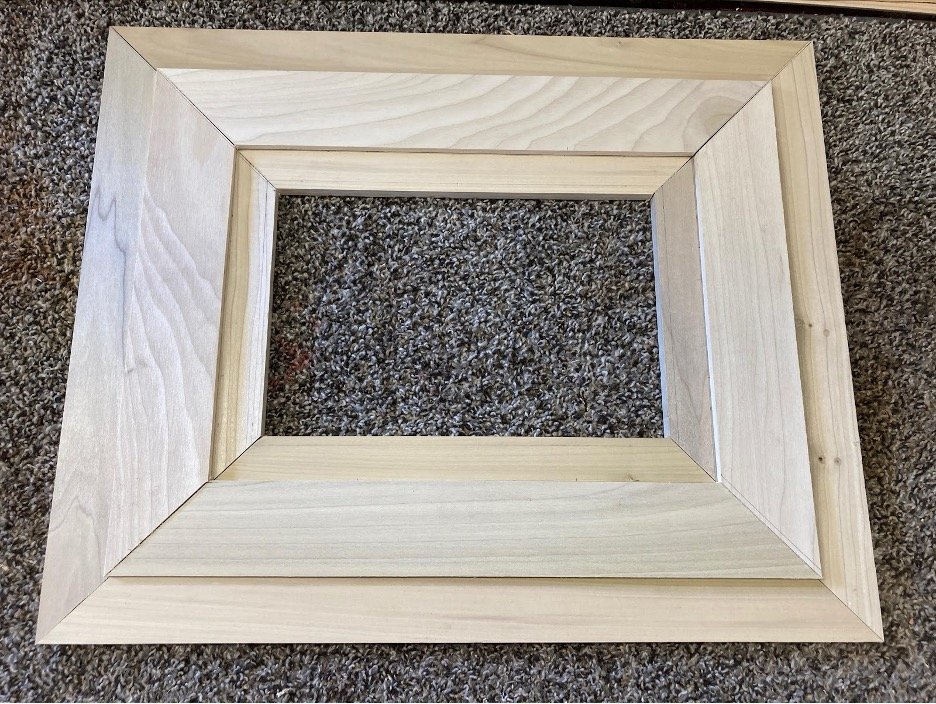
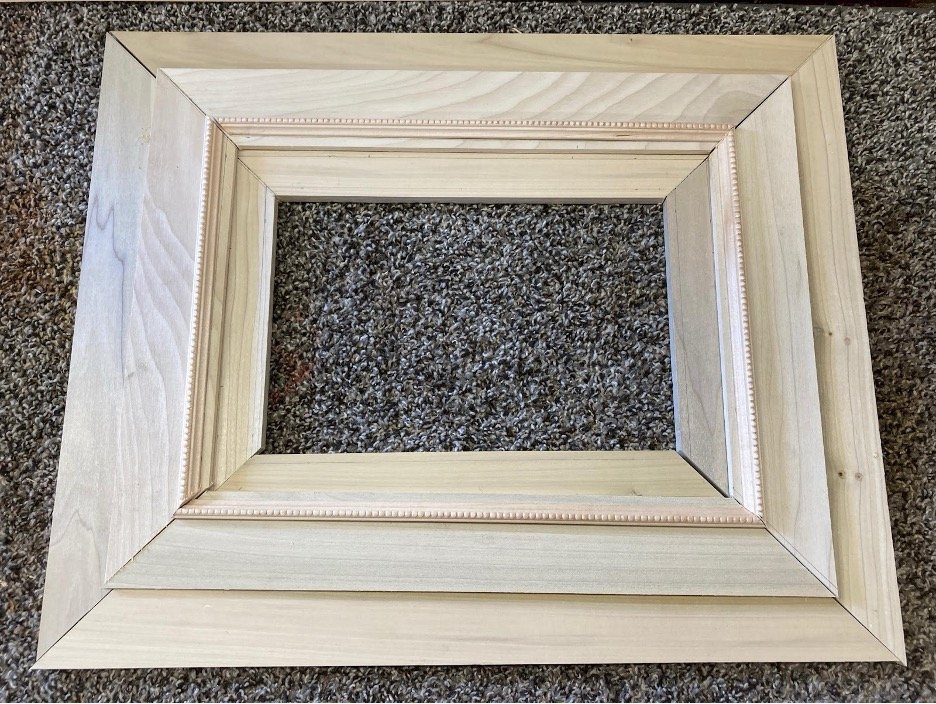

The frame was already taking shape, but it was at this point where things got… tedious. I had to cut the cove pieces (E) to follow the contour of the Flemish corners and make sure that each cut was very precise. I cut 20 pieces of the cove molding in total, and here is how it looked once everything was glued up and I began to apply putty to the imperfections:

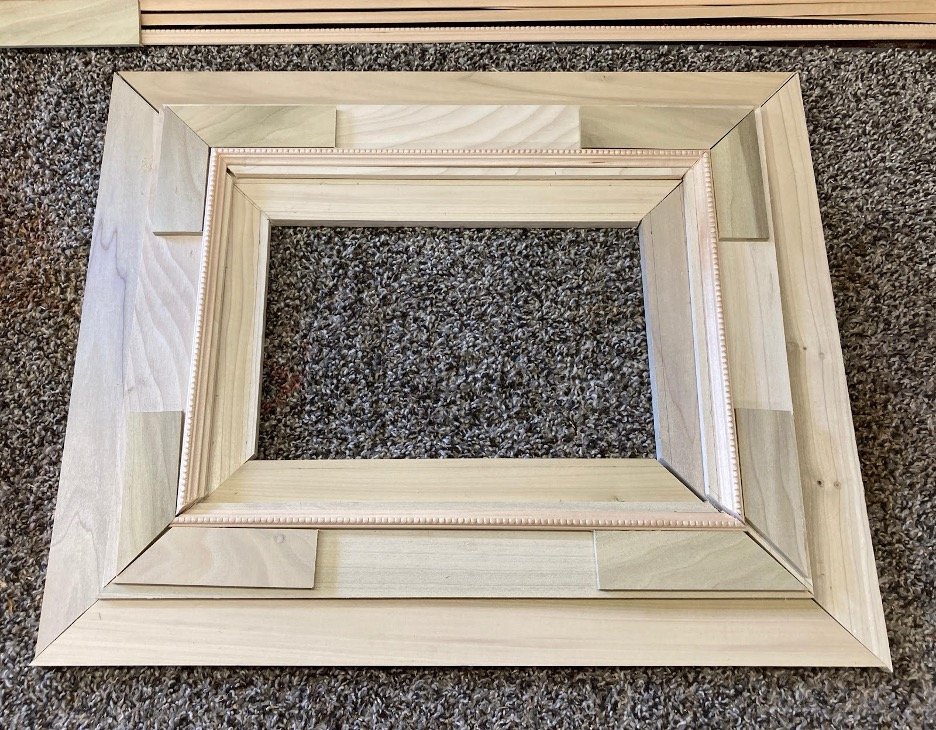
This was the first photo I took after attaching the cove pieces, and it was taken while doing a test fitting of the painting in the frame (I wanted to make sure everything fit before moving on). The test fitting was the first moment I realized… that this frame was VERY large. It absolutely DWARFS the painting. It reminded me of those old TVs with the massive boxes and tiny screens. And after looking at the painting in the frame for the first time… I couldn’t stop laughing. I heard once that for every foot of a painting, there should be an inch of frame. Which means that this 12” wide painting should have a frame that is about 1” wide.
My frame is 4½” wide. Oops.
Anyway, it was too late to shrink the width of the frame, so I decided to just keep going. Besides, this was where the fun part began (or at least so I thought): it was time to make the ripple molding.
Ripple Molding
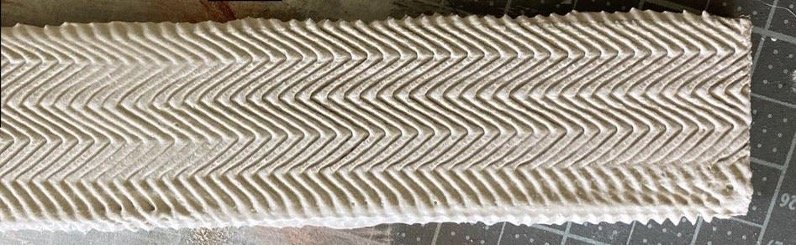
I thought a lot about how I was going to do this. I wanted to use something like acrylic gesso, but gesso shrinks as it dries, and I wanted the ridges I created to be well-defined. I had to find something that would hold its shape while it dried, which made me think of using Plaster of Paris. Using a wooden comb I had made with just some small cuts on a bandsaw, I did a few tests on scrap pieces of wood that went really well. The plaster held its shape. The ripples were well defined. Everything dried smooth and it looked neat. I felt ready to make my first piece of herringbone ripple. I did everything I had done on the test pieces. And this is how it came out:

Test #1:
Fail
I knew from the beginning that the ripples weren’t going to be perfect since I was just free-handing them. But this was garbage. I have no idea why the plaster was so grainy (I mixed it thoroughly), but I assume this caused it to get caught in between the teeth of my wooden comb, which led to this monstrosity. I wiped it off and tried again. And the same thing happened. So, I tried again. And again. After try number 7 (?), I was ready to use my frame as kindling. I still don’t know why these attempts were so terrible. I had also accidentally broken the wooden comb I had made. I was feeling really disheartened. This was meant to be the central element to the design of the frame, and if it was going to look this bad, I didn’t want to put ripple on the frame at all. But I really, really didn’t want to give up. I decided to clean up and try again another day.
Luckily, the next time I tried, something clicked, and it all came together. To replace my wooden comb, I ended up using a metal shedding blade that we bought for my dog, Declan (he didn’t mind). With the exception of the comb, I didn’t do anything differently, so I’m not sure why these attempts went so much better, but I’m trying not to question a good thing. The ripple I made certainly wasn’t perfect, but it was much better than my first attempts, and I was much happier using slightly wonky ripple than no ripple at all:

Test Fit
I purposefully cut the molding to be too large so that I’d be able to sand off the less than ideal edges, but seeing the molding with the frame had me feeling really excited all over again.
I sanded the ripple to size, attached it to the frame, and began to think about the next problem: how to create the basket weave ripple for the Flemish Corners. My original plan was to use something called Radio Net Cane, which is a type of cane that comes pre-woven in a fine woven pattern and used as a seating/ decorative material for chairs. However, we didn’t have any of this material at work like I originally thought we had, and I ultimately decided I wanted something that was more similar to the Dutch basketweave pattern:

I noticed the pattern looked like it could be made with very small pieces of wood staggered like black squares on a chessboard and then smoothed over with Plaster of Paris to make it look more similar to a weave. In hindsight, I’m glad we didn’t have any Radio Net Cane because although cutting and gluing a bunch of tiny strips of wood to my Flemish Corners is not exactly my idea of a fun time (it was EXTREMELY tedious and took me several weeks to complete), the end result was much closer to what I had envisioned. I think the pattern I ended up creating is my favorite part of the frame.
I should also mention that the frame is red in this next picture because I wanted to use the red as an undertone to the final black color of the frame. If you look at the image above, the frame is black, but there are some areas (such as just to the right of the painting) where some red comes through. This was the plan for my frame, but it didn’t end up working out unfortunately (when I later tried gently sanding away the top layer of black, it took the red color with it).

Finished Corners
After the wood was all glued down, I carefully smoothed it out with some Plaster of Paris over the top, painted it red (in vain), and sealed it all with shellac.
It was very exciting to see it all finally come together. There was only one step left… time to ebonize it:

And it was done! Firstly, I’ll say that I’m very aware that this frame is far from perfect. It took me several months to make because I just didn’t have the time to sit down and dedicate several hours at a time to it (I started this frame in July, and the photo above was taken in October). While I was able to cut and join the wood pieces at work, all the finer details happened at home, and my apartment is very small; too small to have a proper workspace (the surface it’s sitting on in the photos is my coffee table). However, despite the challenges and perfectionism aside, I’m so, so happy. I don’t say this very often, but I’m quite proud of what I’ve achieved, and I’m feeling very inspired and excited for what I will be able to create next.
Unexpected Drama
That last paragraph was where this blog post was meant to end. It’s been about three months since I wrote it, and while I was writing it, my painting was sitting in its frame up on my easel, and I was in the process of deciding where in my apartment I wanted to hang it. But while I took a few days to edit this blog, one night we were woken up by a loud CRACK. We weren’t sure what caused the noise, until the next morning when I went to have a look at my frame and saw that two corner joints had burst apart. Not only that, but I realized some of the rippled plaster looked to be peeling off the wood beneath it.
Ironically, as someone who works in art/ furniture restoration, I was able to pretty quickly pick up on all the fatal flaws I made in the construction of this frame. Bear with me for a bit, I’m about to get technical. Firstly, I used fish glue as the adhesive on this frame. This may seem like a strange choice, but I chose it because it is a great adhesive to use in the restoration of wooden objects/ furniture, so it’s the glue I’m most comfortable using. Fish glue is an excellent choice in the world of restoration for many reasons, one of which is because it may be strong, but it is weaker than more modern wood glues. The reason this is an advantage in restoration is because you always want your glue-job to be slightly weaker than the areas around it so that if something goes wrong, it is your repair that breaks, not another section of the antique. In hindsight, I should have recognized that while fish glue is great for antiques, its level of strength is not necessarily an advantage with a new build.
Another mistake I made is not sealing the back of the frame. This meant that the wood was exposed to its changing environment, which is a problem given that wood is an organic material that is particularly affected by temperature and humidity changes—meaning that it expands when temperature and humidity rise, and contracts when they fall. This is why museums keep their gallery spaces at a very consistent temperature and humidity level. However, my apartment is not a museum. Even worse, I live in New Hampshire. Which means we have drastic changes in temperature and humidity throughout the year, especially when seasons change (remember that I finished my frame in October). Also, my partner and I try to conserve energy by only turning the heating on in our apartment when we feel we need it. So the wood in the frame was expanding when the heat turned on and contracting when it turned off . This movement in the wood was exacerbated by the overall temperature drop that comes with the arrival of Autumn. Additionally, fish glue is hygroscopic (which is why it can be reversed with water), and therefore also susceptible to humidity changes. The combination of a poor choice in adhesive and the unsealed back of the frame (leaving the wood exposed to its changing environment) led to two of the corner joints failing so soon after I finished building the frame. As for the plaster, because it is much less susceptible to temperature and humidity changes, the wood was expanding and contracting while the plaster stayed the same, causing it to begin to detach from the wood (the image is blurry, but if you look closely, you can see the texture of the flaking plaster in the herringbone ripple on the right side of the frame in the image below):

Resoration
Luckily, I know someone who has lots of experience in restoring frames! Spoiler alert: it’s me. In fact, I am MUCH more qualified in repairing frames than I am in building them (clearly). Although it took a while to get around to it (life got busy, other projects took priority, I had already spent so much time on this frame that it was hard to invest more into it), I was easily able to repair the frame. Firstly, I stabilized the flaking plaster with an adhesive that has a similar viscosity to water, which allowed me to flood the area with glue, let it seep through the cracks to get under the plaster, and then wipe away the excess on top.
Once the plaster was stabilized, I cleaned the original fish glue off the wood in the corners and re-glued them using Titebond III (which is much stronger and more permanent than fish glue). I also needed to cut small wooden wedges to insert into the inner corners of the joints because the wood had altered its shape so severely that the 45-degree corners no longer matched up. Unfortunately, this means that the frame is not perfectly square anymore, but I like to think that these imperfections make the frame look like an antique. Or, at least, that’s what I tell myself…
Once the frame was once again whole, I sealed the back with some Shellac. While this won’t completely stop the wood from expanding and contracting, it will act as a barrier from the changing elements and significantly reduce natural movement in the wood.
While I was at it, I decided I wanted to try again to add the red details along the edges of the wood. Rather than sand away the black paint to expose the red paint beneath, I mixed some red pigment into shellac and carefully painted the red on with the edge of my paintbrush. I’m really happy I tried again with the red because when the frame was a uniform black color, it looked a bit flat and cold. It’s subtle, but I think the red breathes a bit of life and warmth into it and highlights the varying textures I managed to create.
So now, I can officially say that the frame is done, the painting secured back into it, and it has been hanging on my wall for around a month now. Even though it broke so soon after I finished it, I’m still so proud of what I’ve managed to achieve. It’s obviously far from perfect, and I’m sure that I’ll have to make more repairs in the future, but so be it. For a first try at such a complex frame, I’m just thrilled I produced something so visually interesting and close to what I had initially imagined. I’m also happy I actually finished it despite how frustrated I got and how many times I wanted to give up. I’m sure one day in the future I’ll make another Dutch Ripple frame, but next time, I’ll know what not to do…